
Since Microsoft migrated Classic Stream to the new Stream on SharePoint, we have noticed a lot of changes and thought it would be good to set out the best practice for new Stream (on SharePoint). Watch the video below or you can find out more below.
Creating a centralised folder for your student video resources
We recommend creating a centralised folder for your student video resources, on a team site that will not be removed each year, for example, a staff area.
In the folder, you can store all your team’s video resources for students.
Creating one folder where all staff can upload files will mean valuable resources are not lost when team members leave.
Adding additional access for all students will ensure a minimal amount of admin to maintain access as students start or leave. Permissions will cascade down to all subfolders and files as well, again reducing admin.
To start, navigate to the Teams site you are going to use. This should be a staff space to facilitate continuity.


Select the Files tab, select New, select Folder, enter the name for the folder for example ‘Student video resources’ then select Create.

Once the folder is created select the ellipses (3 dots) button, then select Manage access from the pop-up menu and the window will open.
Select the + icon next to Direct access to Grant access, in the grant access window type in “Students” and select the student group.
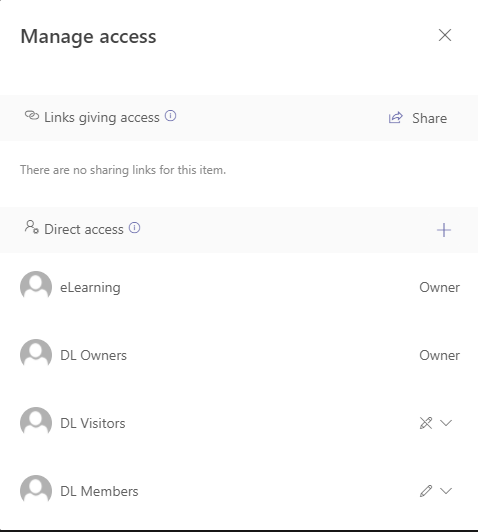

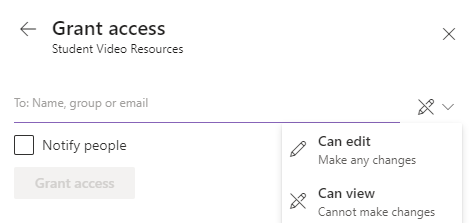
From the pencil make sure you set access to Can view
It is ESSENTIAL you untick Notify people otherwise you will notify every student within the college via email.
Finally, select the Grant access button to process these permissions.
Now you have set up the main folder and added the permissions, you can now add your subfolders and files and the permissions will cascade down providing the correct access for everything.
Adding your existing videos from OneDrive
It is possible to move a single file or an entire folder to a new location as needed. You may want to move video files currently stored on your personal work OneDrive or Recordings you have made straight into new Stream or Teams Recordings.
To do this navigate to your OneDrive using a web browser, Chrome or Edge for example, find the folder where your videos are located for example the Stream Migrated Videos folder.


You can then either select the folder or particular files within it by ticking the circle to the left of the folder or file name, you can select as many folders or files as needed, then select Move to at the top of the page.
Select the team where you want to move the items to, from the Quick access list on the left, if the team isn’t there select More places…
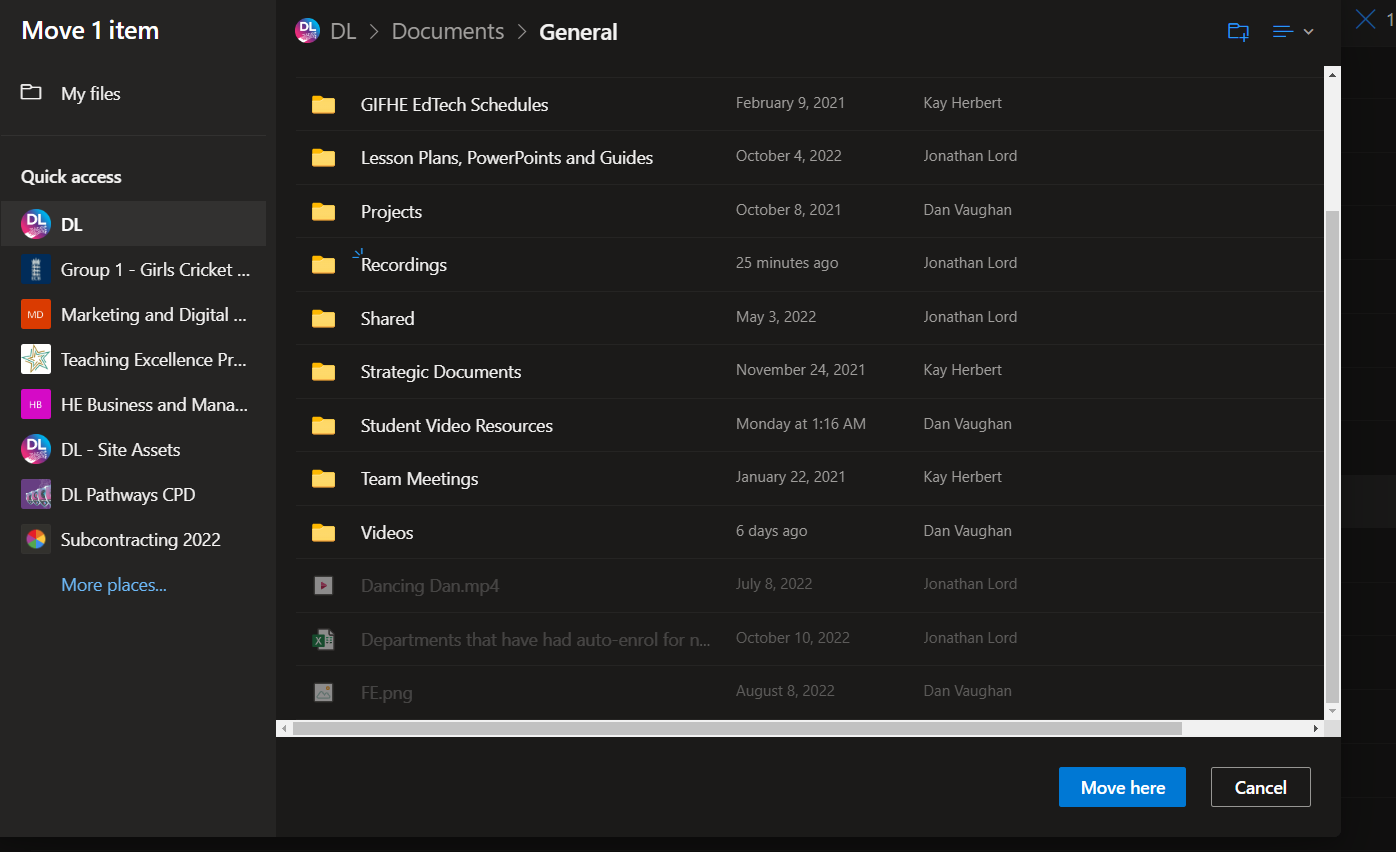
Locate the folder from the directory and select it, once you have done this select the Move here button and the folder or files you selected will move to the new destination.
Now, the files may fail to move and you may receive a notification stating ‘The file or folder contains properties that will be lost at the new destination’ this is to do with Metadata and you can just select Move anyway and the files will move.
You can also move files from inside Stream, with the video open that you wish to move, select the Move to button at the top of the window and follow the same process as before and your video will move to the new destination.
Help and Support

As always contact the Digital Learning Team for more information, guidance, and support.