With the abundance of Teams sites across the organisation it can sometimes be difficult for you and your students to find the Team/s you are looking for. We have therefore created a quick guide for best practice when creating, naming categorising and structuring Teams sites.
Creating Teams
To create a new Teams site you will need to:
- Select Join or create team
- in Grid view this is at the top right of the window
- in List view this is at the bottom below the list of teams.
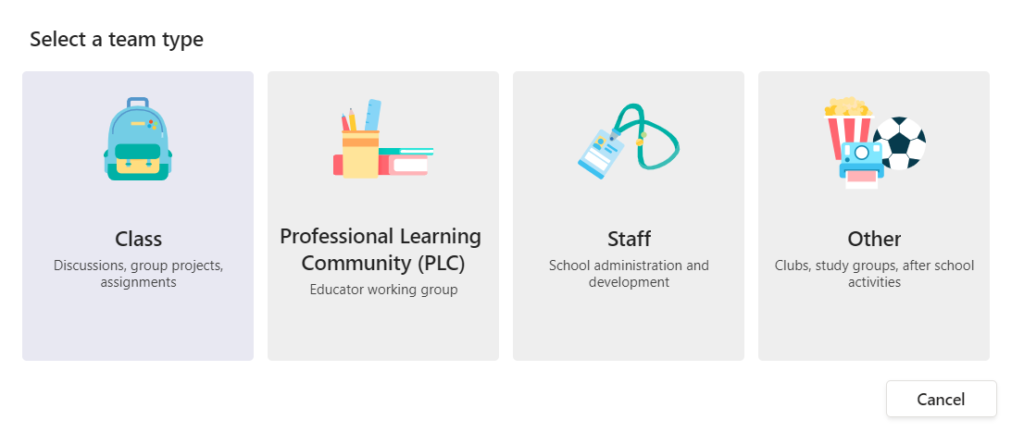
- Select an appropriate Teams type (see the image below for the different types)
- Add a description for context and clarity
- Select Next
- Add the required Staff or Students
- Your site is now ready to use

*Note: It is essential that you choose the correct Team type as this cannot be changed later. You should select Class for teaching sites. You should select Staff or PLC (Professional Learning Community) for Curriculum or Business Support staff.
Creating Teams from a template
To create a Teams site using an existing template, follow Steps 1 – 3 above and then before moving onto Steps 4 and 5:
- Select Create a team using an existing Team as a template. Additional owners and members in your existing team will not be pulled through to your new Team when creating it this way.
Naming Teams
When naming a new Class Teams site, you should use a name that is meaningful to you and others and includes the ProSolution course code and the group as a suffix. See the example below:
Unit 1 Sport Nutrition – TFG1234/A
Meaningful Name – Course Code/Group
When naming a new Staff Teams site, the naming conventions should be short so that users can see key information. Keeping naming conventions short and at the front allows them to be visible in all these contexts while still showing the primary subject in the name.
DL Team
Digital Learning Team
Renaming Existing Sites
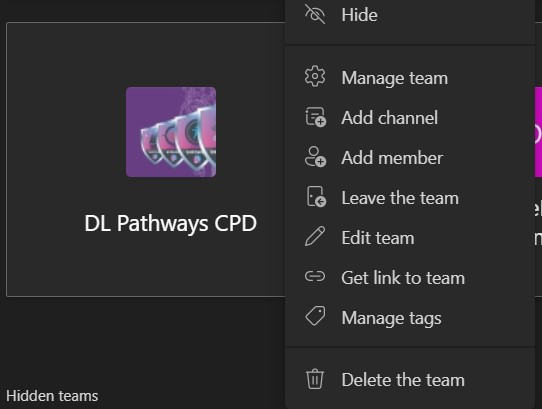
To rename a site and add the prefix to one of your existing sites you will need to edit the Team. To do this:

- Locate the site you wish to edit
- Select the ellipses or … next to the name
- Select Edit team
- In the team name box add the prefix as shown
- Select update
Categorising Staff Teams
The college has invested in the ShareGate: Apricot tool to help us identify how our Teams sites are used and manage them more effectively. When categorising a Staff Team you should follow these two steps:

- Look for the ShareGate: Apricot message.
- Select the business purpose of the Team From the list.
Structuring Teams
FE and HE Class Team Sites
It is best practice to create a Class Team with channels as opposed to having a bunch of different teams with the same set of members. Channels can be created for topics, units/modules, group work and more. These channels can then be used to organise the associated files, conversations and apps in one place. The General channel can be used to share an overview of the team, for announcements and other generic information. You can choose whether you would like your channels to be Standard or Private. Standard channels will be available to everyone. Private channels will only be available to the students you choose and could be used for yourself and other teachers in the Team. When creating channels in Teams you can choose which channels are visible to team members.
Staff Team Sites
It is best practice to create Staff Teams with a larger set of members and more channels as opposed to having a bunch of different teams that have the same set of members. Channels within a team should be thought of as topics or workstreams to aid the team in organising work to deliver on joint objectives. The general channel can be used to share an overview of the team, for announcements and the onboarding of new members, or other high-level information. Standard channels can be used for conversations that members of the team can contribute to. Private channels can be used when there is a need for a focused collaboration or space with a select group of members.
Support
If you need any additional support please do not hesitate to contact the Digital Learning Team
