
Recording your PowerPoint presentation is a great way to create engaging learning resources for students. Whether you’re preparing asynchronous lessons, flipped classroom content, or revision materials, PowerPoint has built-in recording tools that make it easy to record, annotate, preview, and export a video of your presentation.
A step-by-step guide to recording your presentation.
You will need to use the PowerPoint desktop app to record your presentation. Before recording, ensure your PowerPoint slides are clear and uncluttered, using a large, readable font. Check that any visuals are big enough to see clearly, and confirm that animations and transitions are added and working as intended.

- Select the Record tab on the ribbon at the top of the window. (“Record” can also be found in the Slide Show tab)
- Select From Beginning (or From Current Slide) to enter the recording interface.
Recording features
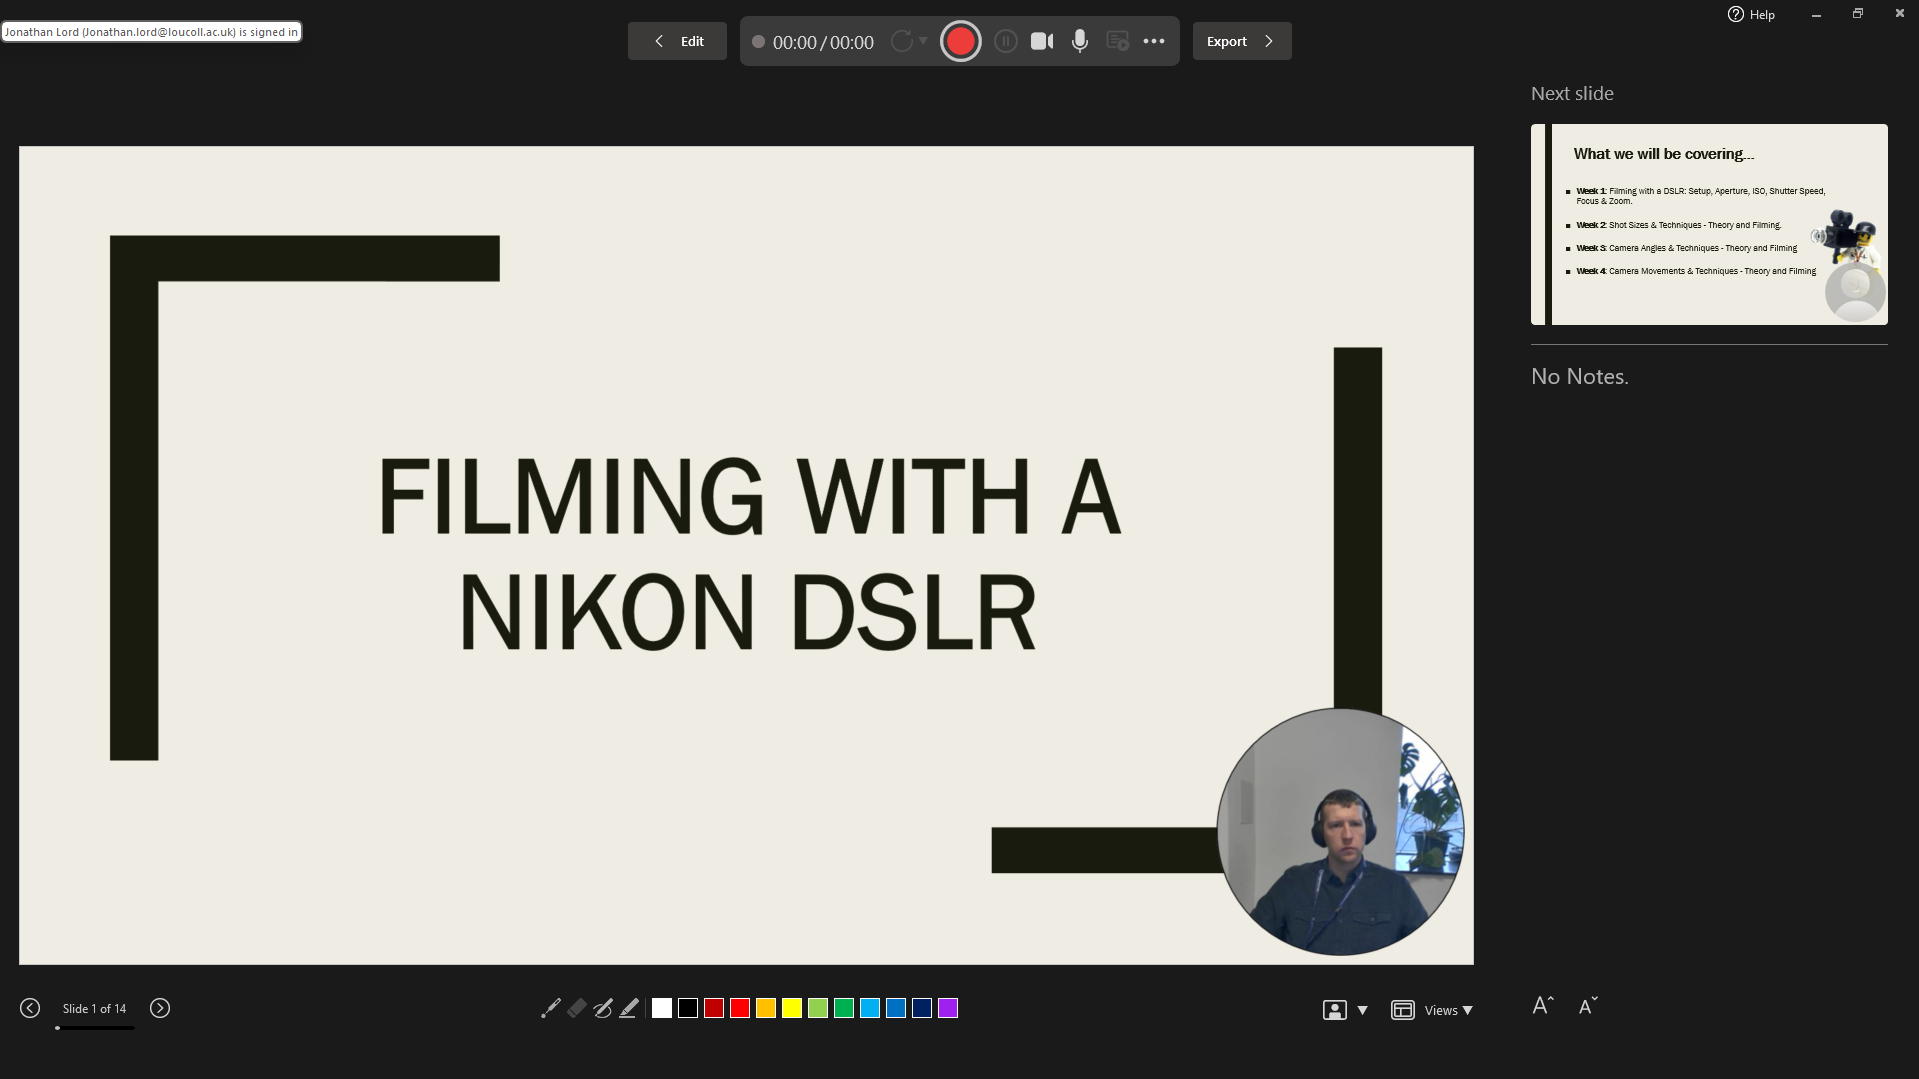
From the recording interface at the top of the window, toggle on Camera and Microphone. From the ellipsis (…) more options button, you can select the microphone and camera you would like to use.
If you have added “Notes” to your slides, you can use the Teleprompter view, which scrolls through the notes at a chosen speed, making it easier for you to read while you present. To turn this feature on, select the Views drop-down menu at the bottom of the window and select Teleprompter.
You can also access and utilise tools including a “Laser pen”, “Pen” and “Highlighter” to annotate or draw attention to content on slides during the presentation.
When you are ready, select the Start Recording button at the top of the window. It will count down from 3, then start recording, and you can begin your presentation. Once you have finished, select the Stop Recording button, and you can then preview the recording. If you want to do it again, you can select the Retake button.
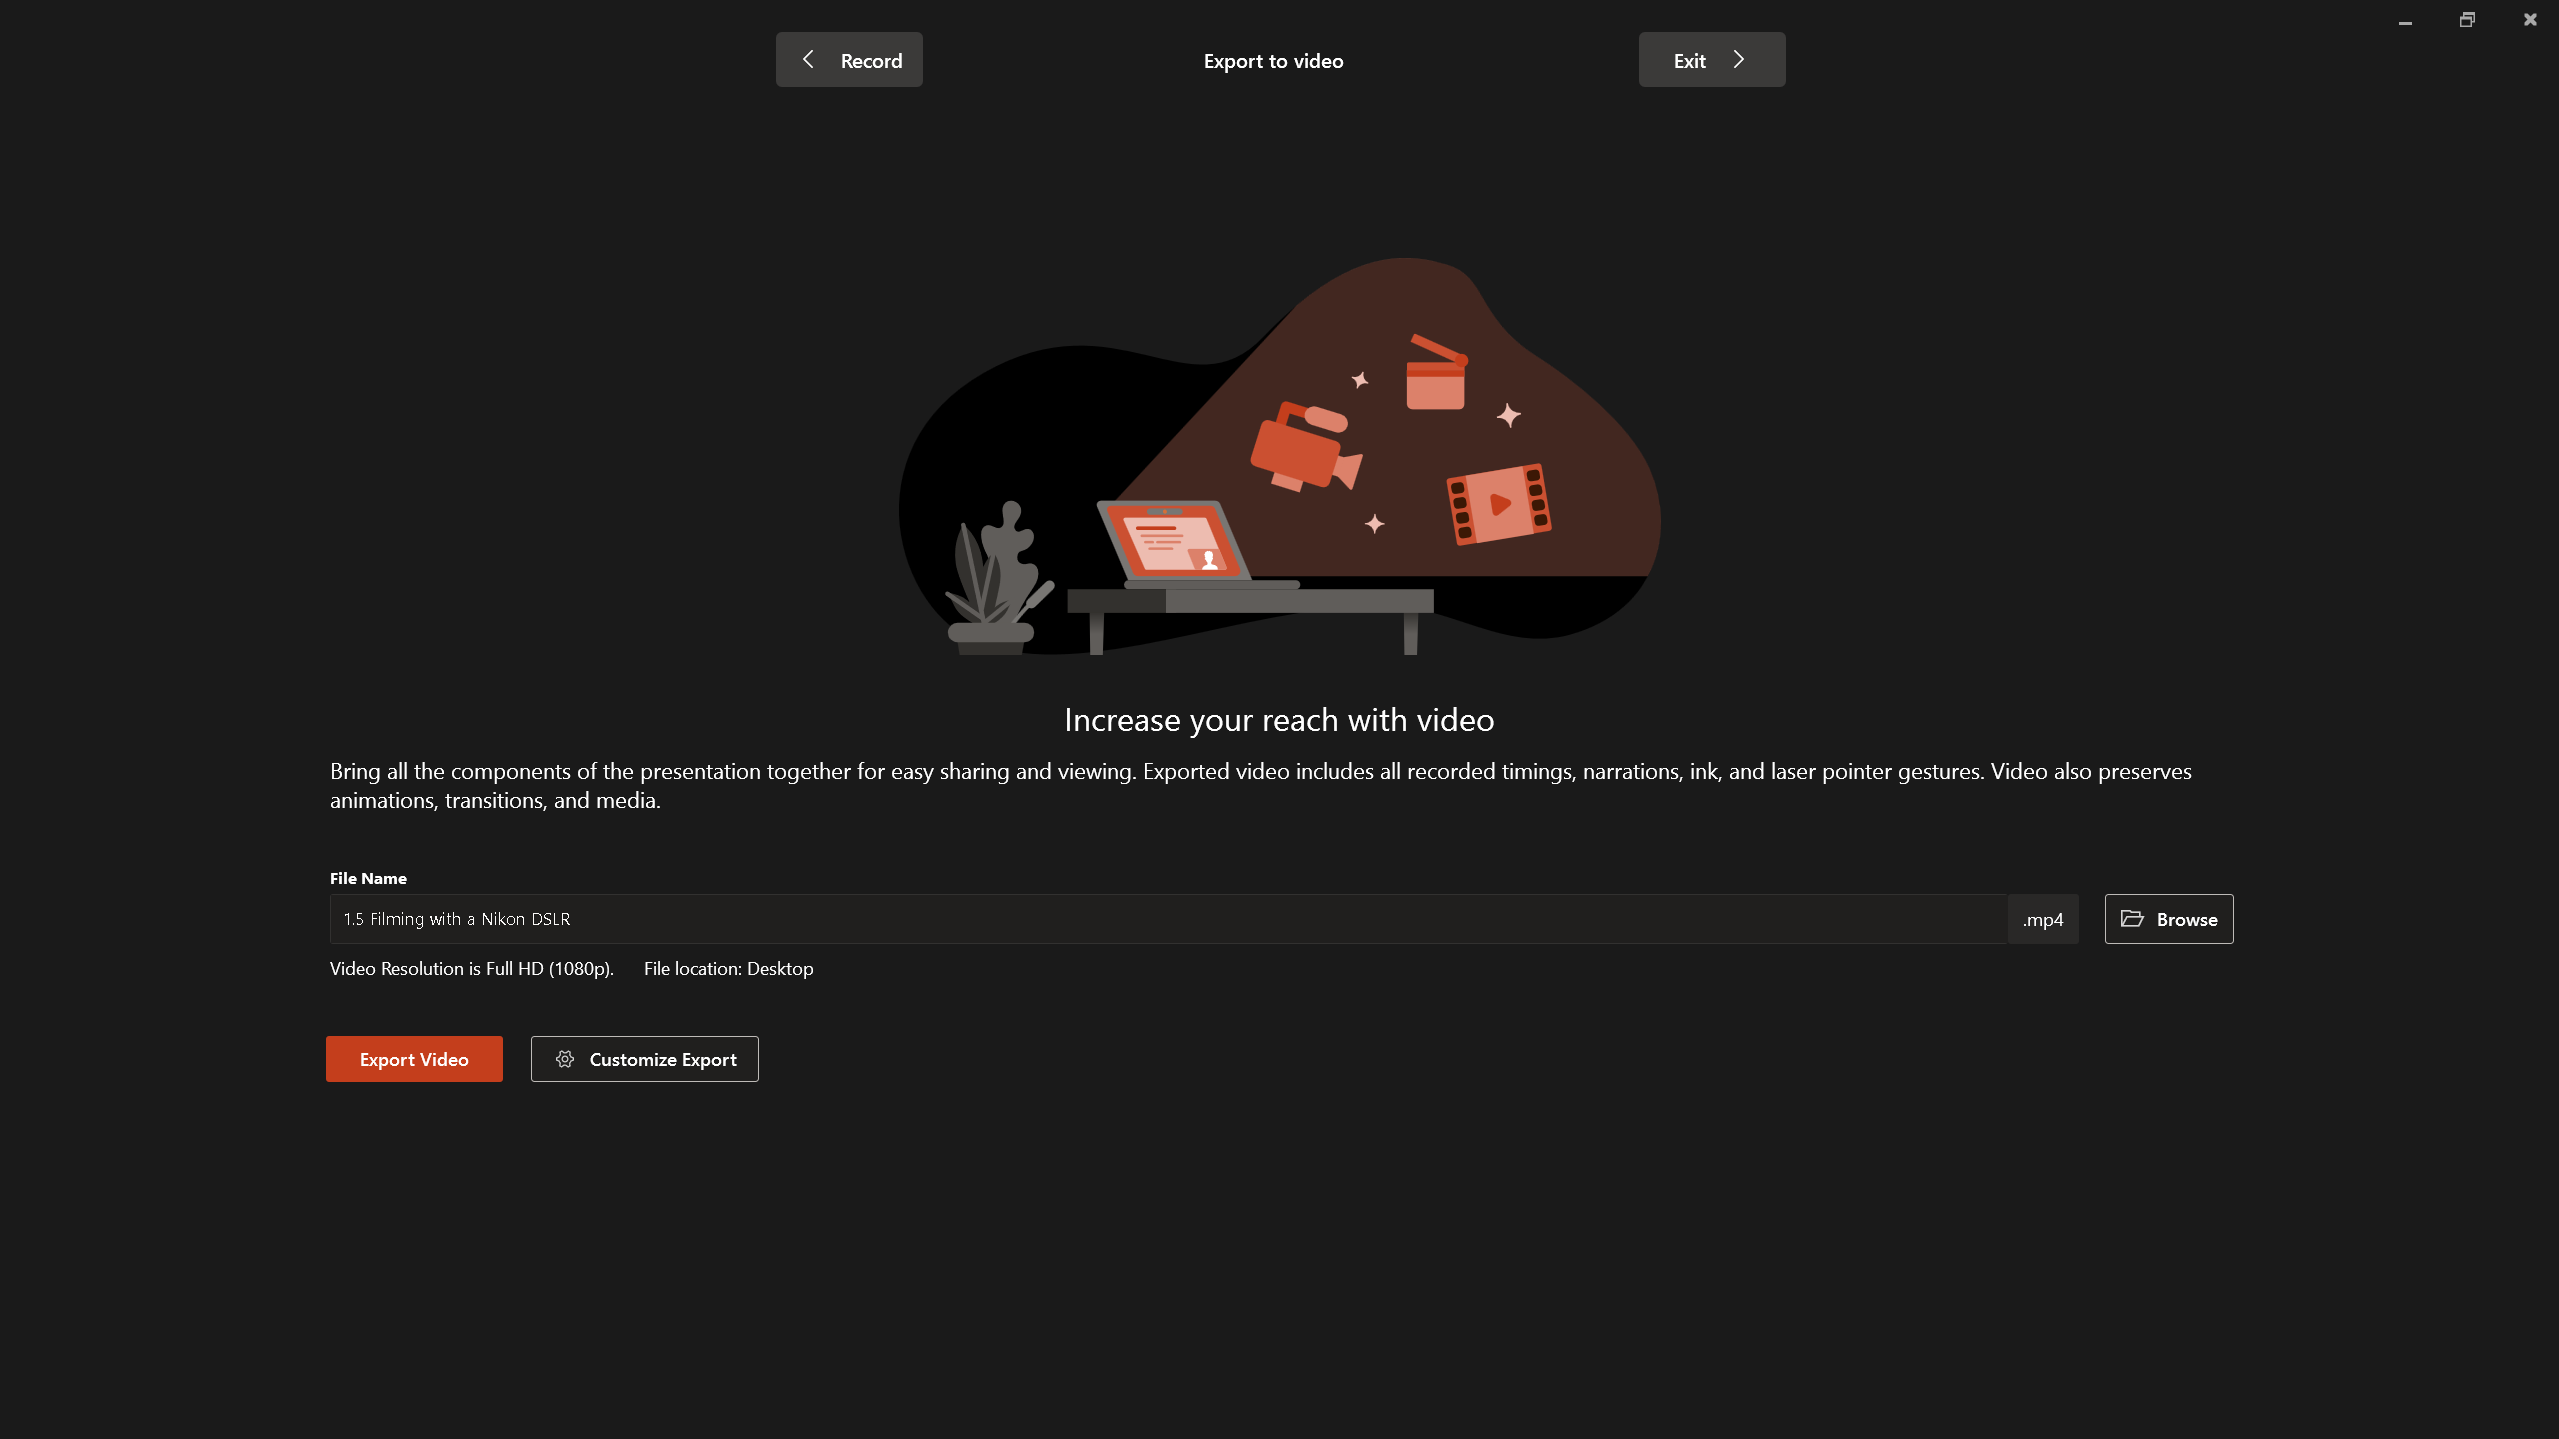
Exporting your presentation
- To export the recording, select the Export button at the top of the window.
- The Export to video window will open.
- Give the presentation a name and select the Browse button to choose where you would like to save the video.
- Finally, select the Export Video button. Your presentation will then export as a video to your chosen location with all annotations included.
Help and Support

As always, contact the Digital Learning Team for more information, guidance, and support.