
The Microsoft Bookings personal booking page offers a powerful, simple, and customisable way to book meetings without endless email threads. Students or colleagues can schedule time with you based on your availability preferences.
Ideal for 1:1 meetings, supervision, catch‑ups, or mentoring sessions. It integrates directly with your Outlook calendar, ensuring appointments automatically appear with all relevant details.
Setting Up Your Personal Booking Page in Outlook
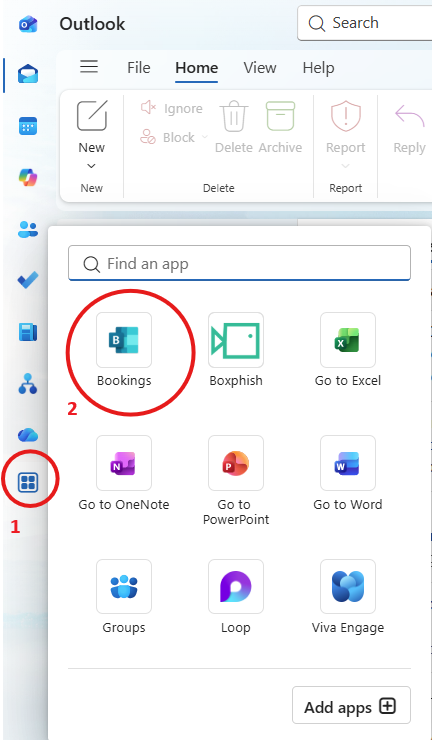
You can access Microsoft Bookings in Outlook on the web or via the More Apps icon (see 1 and 2) on the desktop version of Outlook.
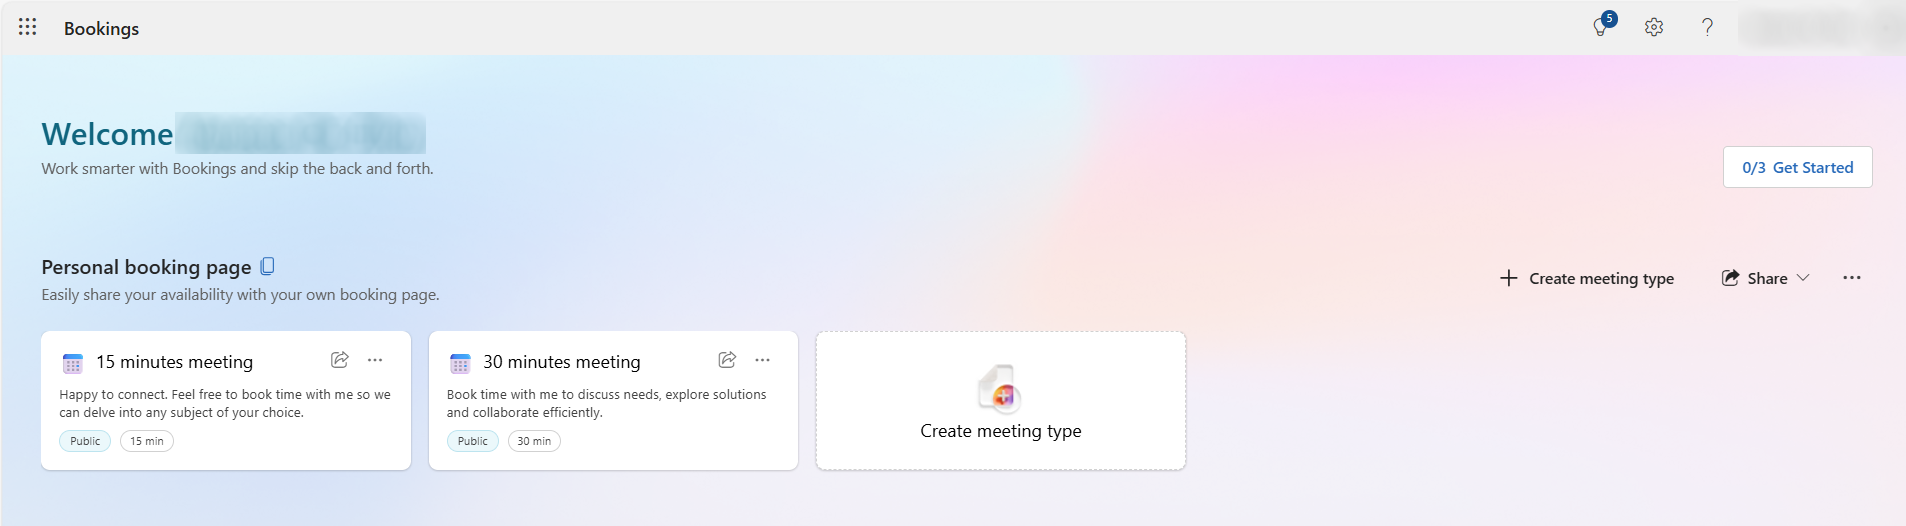
Once you have opened Bookings, you’ll see the Welcome page.
Let’s create your first booking!
- From the Personal Booking page section, select Create meeting type.
- Add Title – Name your meeting e.g “March One-to-Ones”.
- Book time to connect with me – Type in any instructions for the person booking the meeting.
- Location setting – As required (Toggle on Team meeting or type a specific room number.)
- Set a meeting duration: 15, 30, 45 minutes. This can also be customised.
- Select Public for the meetings to appear on your booking page.
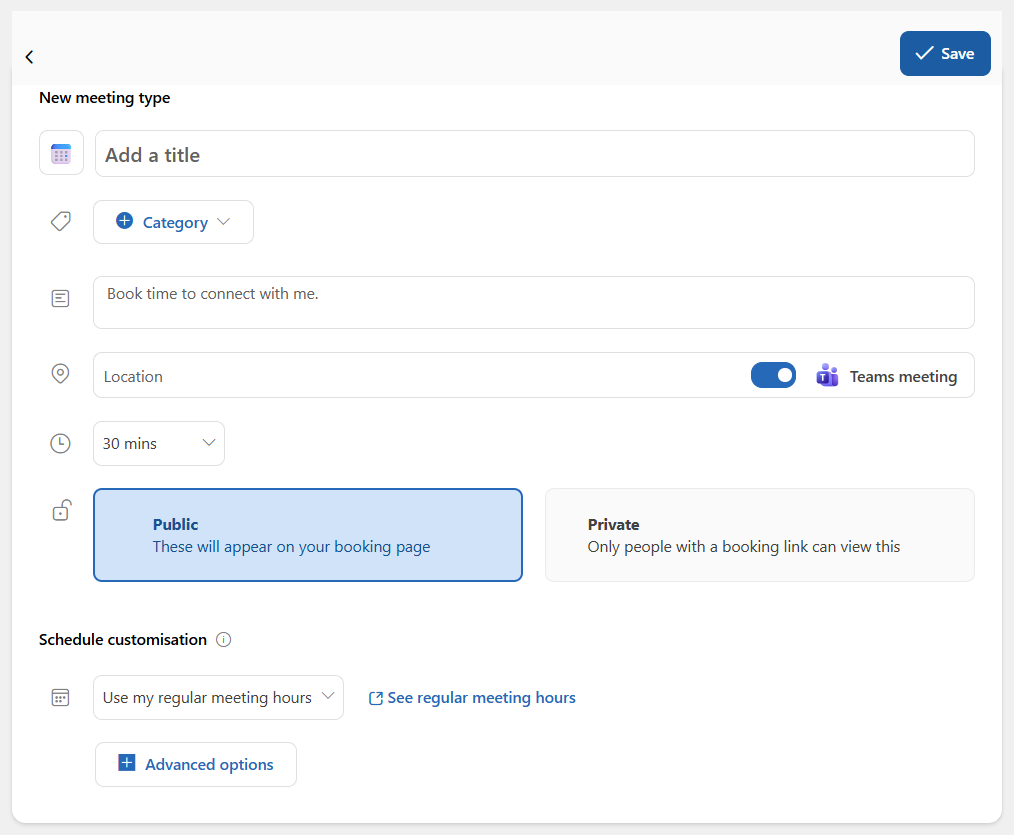
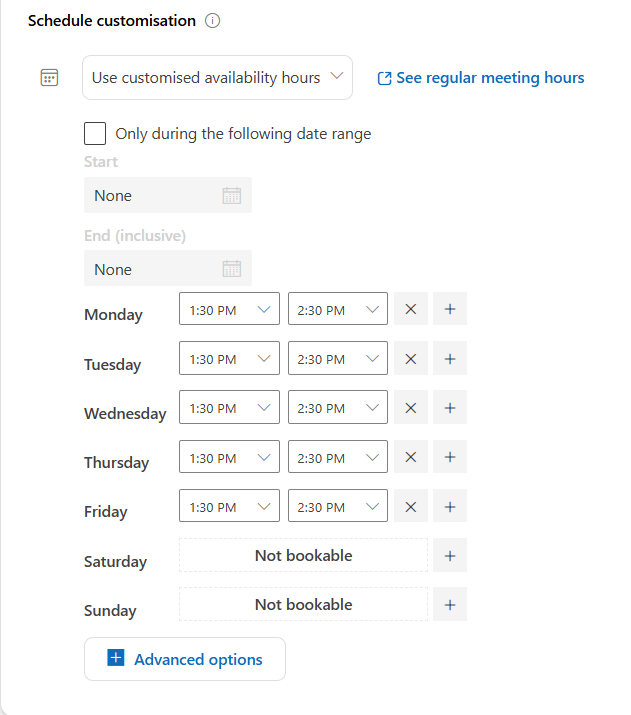
- Schedule Customisation – From the drop-down menu, change this to Use customised availability hours. You can then set your availability.
Schedule Customisation and Advanced Features
If you would like to set your meetings with buffer times, then you will need to use the Advanced Options menu.
This will allow you to add a break on either side of the meeting.
Minimum and maximum lead time lets you set at what point a person can book a meeting with you.
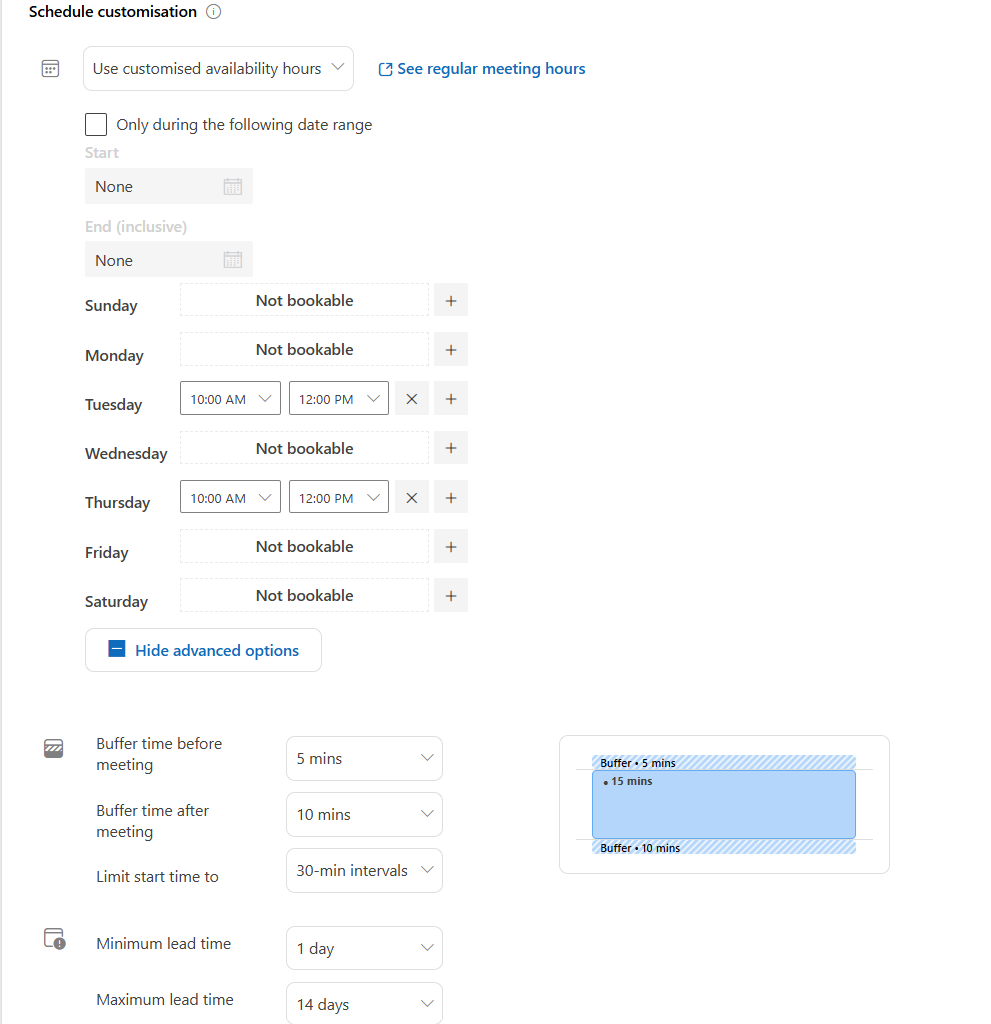
In our example, a lecturer wants to set up their meetings between 10 AM and 12 PM on Tuesday and Thursday. They set these times up under Schedule Customisation.
From Advanced Options, they set up Buffer time before meeting of 5 minutes and Buffer time after meeting of 10 minutes. The lecturer does not want the meeting to go over 12 o’clock due to other commitments. As the meetings are 15 minutes long with a buffer time of 10 and 5 minutes on either side, they Limit the start time to 30 minute intervals so it will not run over 12PM. This means a meeting at 11.40 AM could not be booked.
The lecturer also set the minimum lead time to 1 day or 24 hours to prevent students booking in at the last moment without allowing preparation time. The maximum lead time of 14 days is set so students cannot book too far ahead.
Saving and Sharing Your Bookings Page
When you have completed your booking form, you are now ready to share the link so students or colleagues can book a session with you. Don’t forget to select the save button in the top right corner of the page before you start sharing.
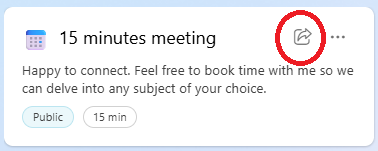
Once your meeting has been saved, you will automatically be sent back to your Personal booking page. Select the meeting you would like to share using the Share button (circled in red on the image).
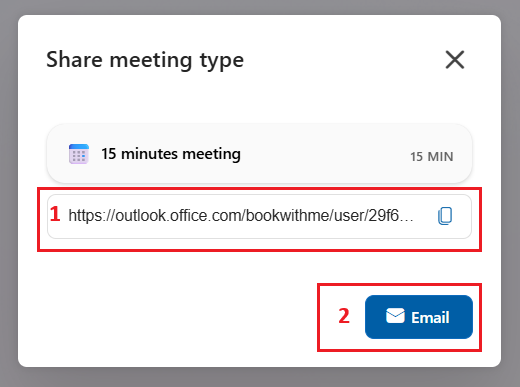
The Share meeting type pop-up window will open. Here, you can either select the copy button (1) to copy your booking link or alternatively, use the email button (2) to send the booking link directly to colleagues.
Help and Support

As always, contact the Digital Learning Team for more information, guidance, and support. You can also book a coaching session here: Digital Learning Coaching.