
In today’s hybrid workplace, keeping your calendar up to date is essential. Clear communication about when and where you’re working is more important than ever. Outlook Calendar has some great features that make scheduling meetings simpler, prevent meeting clashes, and help colleagues understand your availability at a glance.
Work Hours and Location
Whether you are based on campus part of the week or working remotely, setting your work hours and working location in Outlook ensures your calendar reflects your actual working patterns.
By defining your work hours and location, you help colleagues: see your availability for meetings, know if you are working remotely or onsite, and avoid scheduling clashes or contacting you outside your working day.
How to set your working hours and location
- Open Outlook (desktop app).
- Choose Settings (top right).
- Select Calendar from the sidebar.
- In the Work hours and location section,
- Tick your working days
- Set your working start and end time.
- Add you working location for each day, choosing either Office or Remote.
- Save your changes.
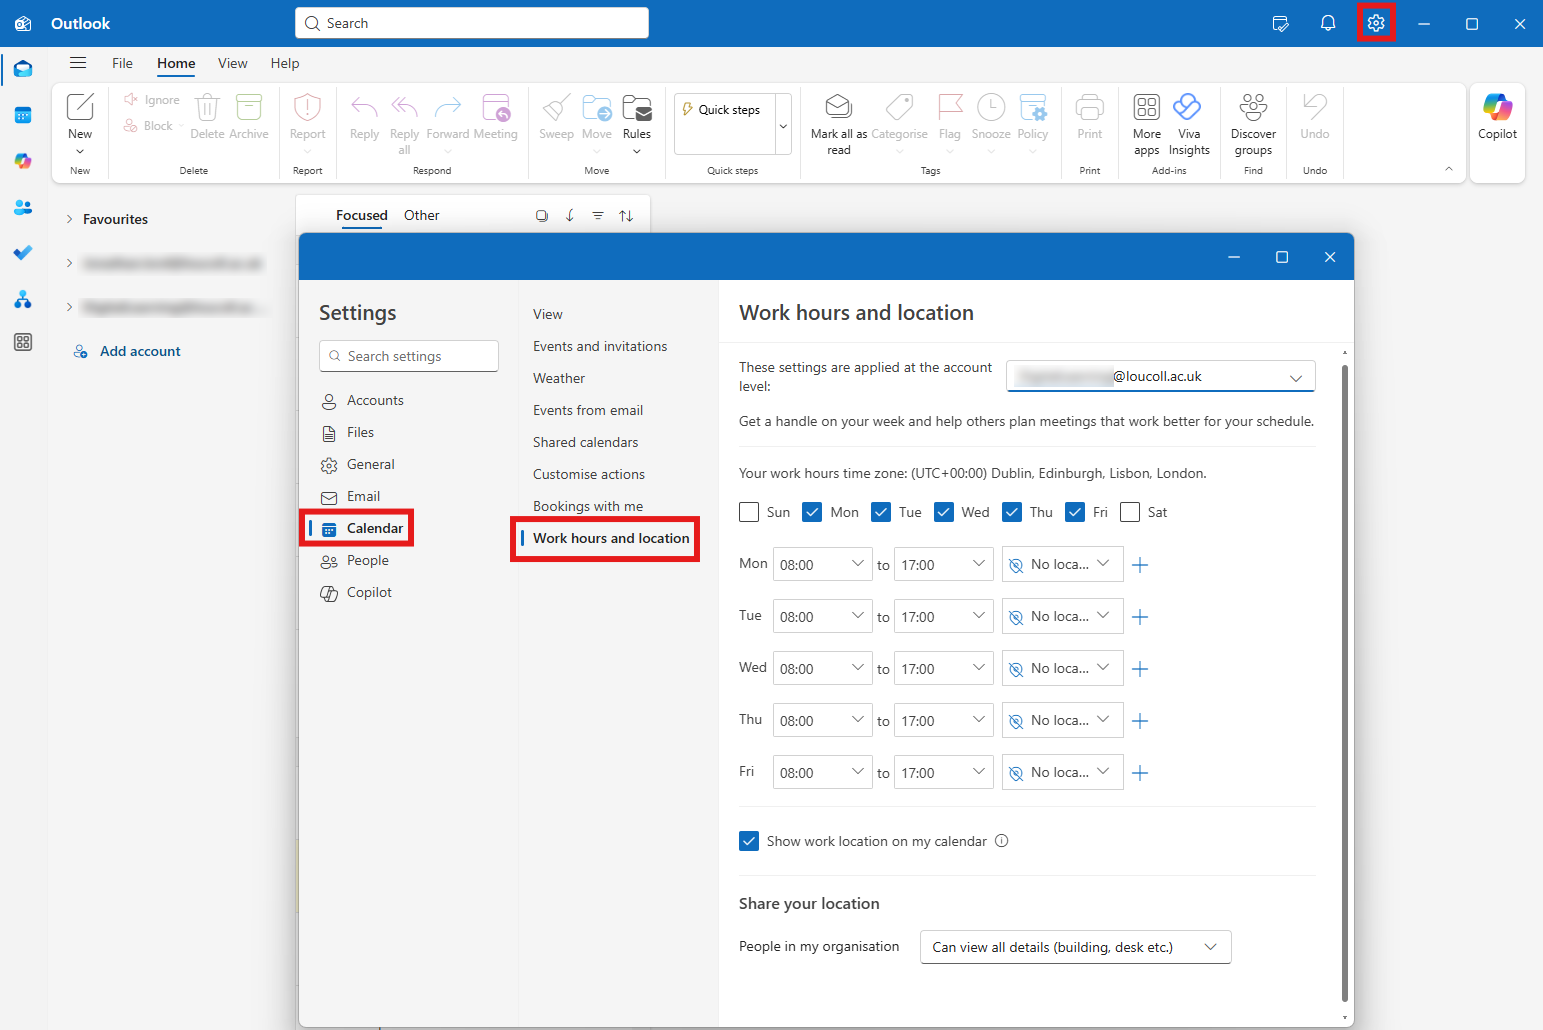
Once saved, your working location appears clearly at the top of your calendar, and colleagues can see it when scheduling meetings.
Location quick change
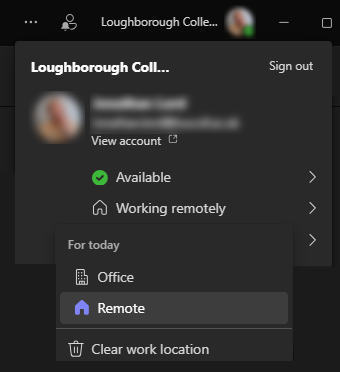
If you have set your working location for each day but plans change and you need to update your location, you can do this quickly in Teams.
- Select your profile picture in the top right corner.
- Then, below your availability, set your working location either to Office or Remote.
Scheduling Assistant
Scheduling meetings can be challenging, but Outlook’s Scheduling Assistant simplifies the process. By providing a clear view of attendees’ availability, it helps you find the best meeting time efficiently, reducing the need for back-and-forth emails.
To use the Scheduling Assistant:
- Create a new Event in your Outlook Calendar.
- Add Attendees – Enter the email addresses of the people you want to invite.
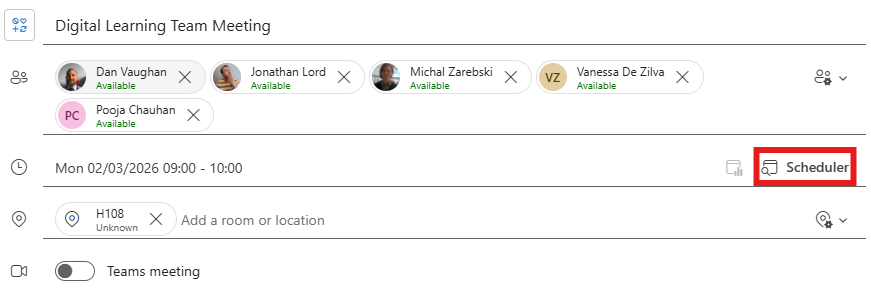
- Select Scheduler from the Date and Time bar.
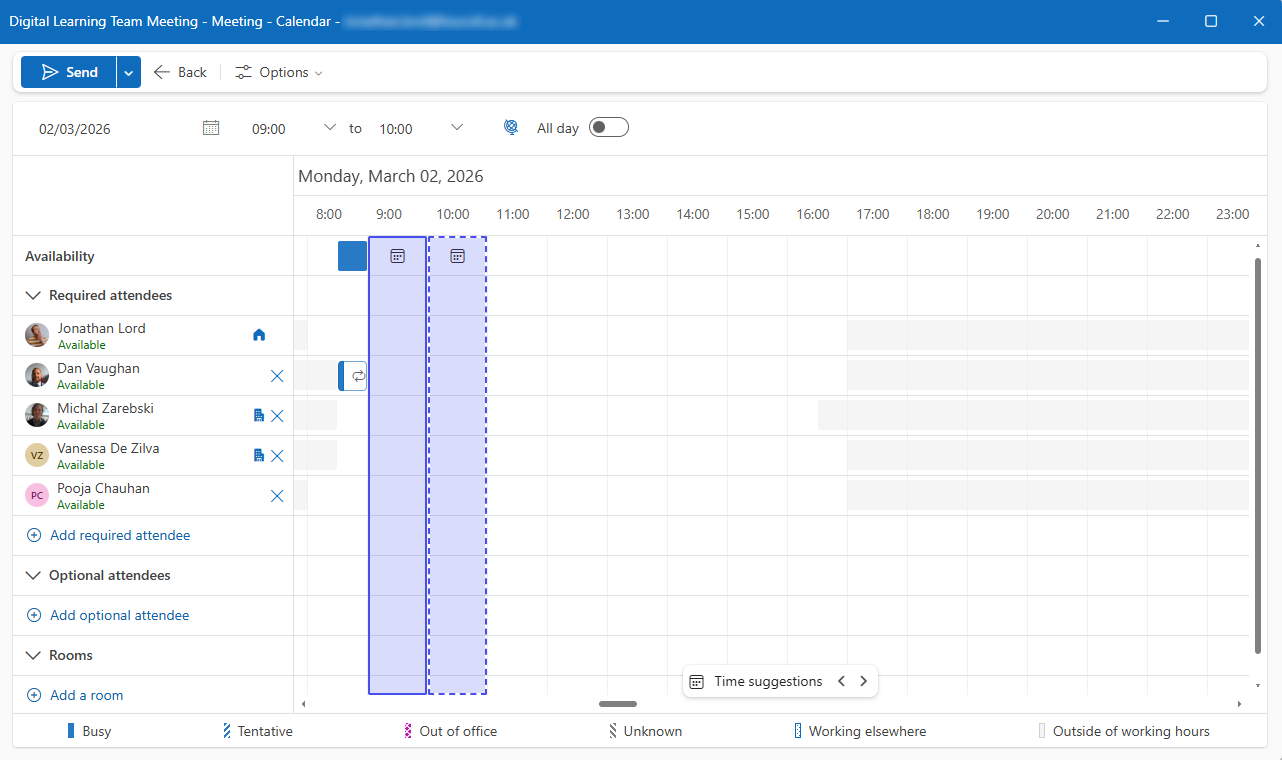
- From the Scheduling Assistant you can see:
- Participants’ availability
- Their working hours
- Their working locations (if set)
- Outlook automatically highlights the best meeting times where all participants are free. Pick a date and time, then select Back to continue editing the meeting details, or Send to invite the participants to the meeting.
Extra Tips for Better Calendar Management
To get the most out of Outlook’s Scheduling Assistant, it’s helpful to know a few best practices. These tips will help you navigate the tool more effectively and avoid common scheduling issues:
- Mark your calendar accurately – Encourage colleagues to keep their calendars updated with busy and free times to improve scheduling accuracy.
- Use meeting recurrence – If you need regular meetings, set them as recurring to save time scheduling future sessions.
- Check attendee responses – After sending the invite, track who has accepted, declined, or not responded by reopening the meeting in your calendar.
- Set your status (Busy, Tentative, Working Elsewhere) accurately when creating events.
By taking a few minutes to set your work hours and working location, you’ll streamline meeting planning, improve team coordination, and ensure your calendar reflects your true availability.
It’s a small step that can make a big difference in your day‑to‑day working life.
Help and Support

As always, contact the Digital Learning Team for more information, guidance, and support. You can also book a coaching session here: Digital Learning Coaching.